Difference between revisions of "Marketing Automation"
Cpetterson (talk | contribs) |
Cpetterson (talk | contribs) |
||
| Line 47: | Line 47: | ||
*'''Wait''': This option will allow you to pause your work flow for a number of months, weeks, days. For example, if you are creating a new member on-boarding workflow, you may wish to wait a certain number of days between your initial email, and a follow-up email. | *'''Wait''': This option will allow you to pause your work flow for a number of months, weeks, days. For example, if you are creating a new member on-boarding workflow, you may wish to wait a certain number of days between your initial email, and a follow-up email. | ||
[[File:Wait.jpg|600px|center]] | [[File:Wait.jpg|600px|center]] | ||
| − | *'''Wait Until''': This option allows you to pause the work flow until a specific date. Enter or select the date that you wish the work-flow to restart in the '''Wait Until''' text-box. | + | *'''Wait Until''': This option allows you to pause the work flow until a specific date. Enter or select the date that you wish the work-flow to restart in the '''Wait Until''' text-box. The work-flow will restart on the day you enter. |
[[File:Wait Until.jpg|600px|center]] | [[File:Wait Until.jpg|600px|center]] | ||
'''Send Email''': This option allows you to select the email you wish to send out. All email templates you have configured in your system will be available for selection in the '''Email Template''' drop-down list. See '''[[Communications_Basics#Create_and_Manage_Email_Templates|Create and Manage Email Templates]]''' for instructions on creating your templates. | '''Send Email''': This option allows you to select the email you wish to send out. All email templates you have configured in your system will be available for selection in the '''Email Template''' drop-down list. See '''[[Communications_Basics#Create_and_Manage_Email_Templates|Create and Manage Email Templates]]''' for instructions on creating your templates. | ||
Revision as of 16:08, 23 January 2019
Contents
Marketing Automation Overview
The GrowthZone Marketing Automation module provides the functionality to set up automated workflows designed specifically around varying communication goals. For example, you may want to have a work flow for new prospects, or perhaps a drip campaign for new members. A workflow can be tied to a campaign list, that will then allow you to automatically send targeted information to key individuals and groups.
Marketing Automation Pre-requisites
- Create the desired email templates to be used in your campaign. See Create and Manage Email Templates.
- Create the desired lists/committees, as needed. See Working with Lists/Committees.
Setup your Marketing Automation Workflows
- Click Marketing Automation in the left-hand navigation panel. A list of all current workflows will be displayed.
- Click the Add Workflow button.
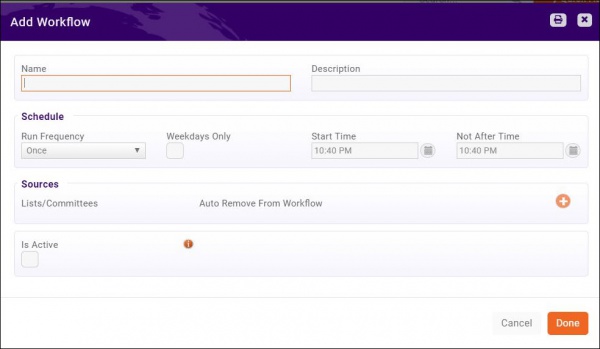
- Configure the following:
- Name: Enter a name for the workflow.
- Description: Enter a description of this workflow. This is optional.
- Schedule: The schedule option allows you to define how frequently the system will check to see if a contact needs to be moved to the next step in the work-flow process.
- Sources: Lists/Committees are used for workflows. Click the
 orange plus, to select the desired Lists/Committees that you wish to include in this workflow.
- Auto Remove From Workflow: Select this option if you wish the entire list/committee to be removed from the workflow after all steps are completed.
- Is Active: Once this is selected, your workflow process will begin. When selected, and you click Done, the system will begin the first step in your workflow process.
- Click Done.
Once you have completed the initial setup of your workflow, you will add steps to your workflow, described below.
Add Steps to Your Workflow
The workflow steps allow you to to build a campaign workflow by defining specific emails that will be sent under this program, including the sequence of the communication and time frame between each communication.
- On the Marketing Automation screen, click the Workflow to which you wish to add steps.
- Click the Workflow Steps tab.
- Click the Add Step button.
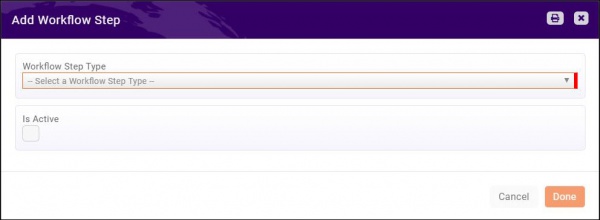
- Select the Workflow Step Type from the drop-down list. See Definitions of Workflow Step Types. Additional options will require configuration dependent on the type selected.
- Click the Is Active check-box.
- Complete additional settings for the selected Workflow Step Type.
- Click Done.
- Repeat steps 3 - 7 to add additional workflow steps to your workflow.
Definitions of Workflow Step Types
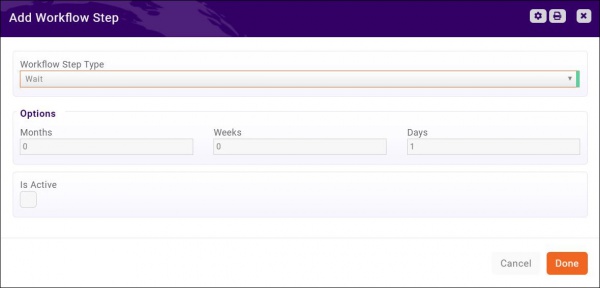
- Wait: This option will allow you to pause your work flow for a number of months, weeks, days. For example, if you are creating a new member on-boarding workflow, you may wish to wait a certain number of days between your initial email, and a follow-up email.
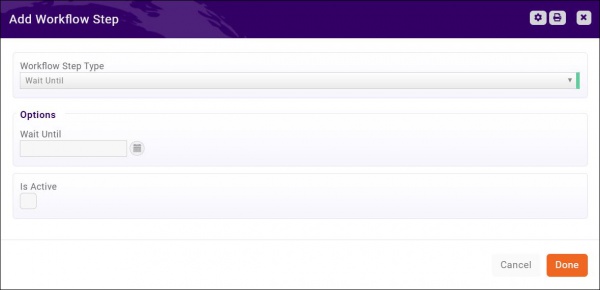
- Wait Until: This option allows you to pause the work flow until a specific date. Enter or select the date that you wish the work-flow to restart in the Wait Until text-box. The work-flow will restart on the day you enter.
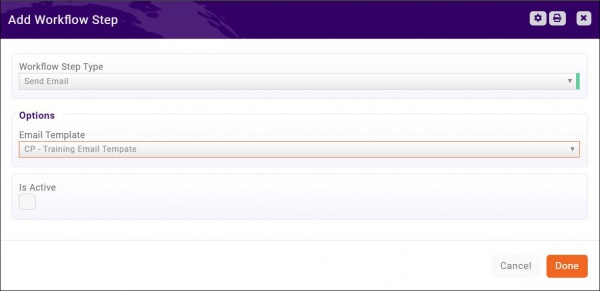
Send Email: This option allows you to select the email you wish to send out. All email templates you have configured in your system will be available for selection in the Email Template drop-down list. See Create and Manage Email Templates for instructions on creating your templates.
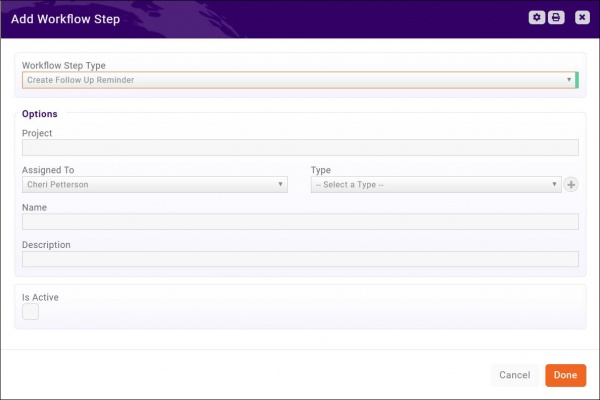
- Create Follow Up Reminder: This option allows you to create a follow-up reminder, for yourself, or another staff member. You may associate the reminder to a specific project, if applicable. Select the staff member to whom you wish to assign the reminder from the Assigned To drop-down list, select a reminder Type from the drop-down list (or click the
 to create a new reminder type), and enter a Name and Description of the reminder.
- Add to List: This option will allow you to add a campaign participant to a specific list. Select the desired Group from the drop-down list, or click the
 to create a new list/committee. See Working with Lists/Committees for instructions on creating lists/committees.
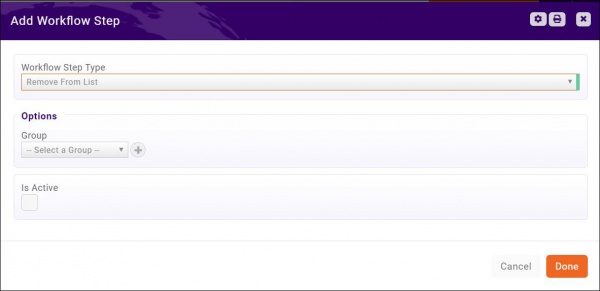
- Remove From List: This option allows you to remove a contact from a specific list. Select the Group from which you wish to remove the contact from the drop-down list.
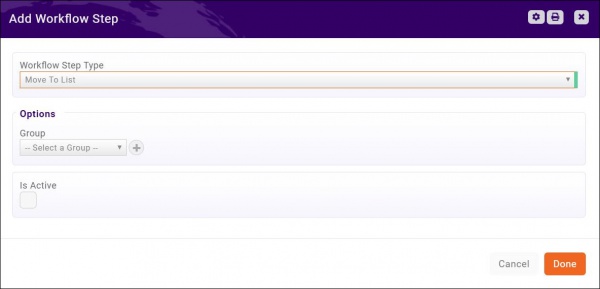
- Move to List: This option will allow you to move the contact to a new list. The contact will be removed from your campaign list, and added to the selected list. Select the desired Group from the drop-down list, or click the
 to create a new list/committee. See Working with Lists/Committees for instructions on creating lists/committees.
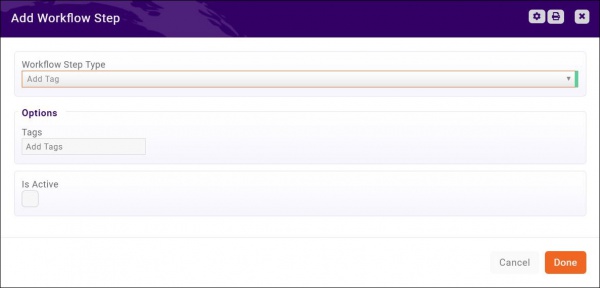
- Add Tag: This option allows you to add a tag to a contact. Type the tag into the Tag text-box, and click enter. Enter additional tags as needed. The tag will be displayed on the contacts page.
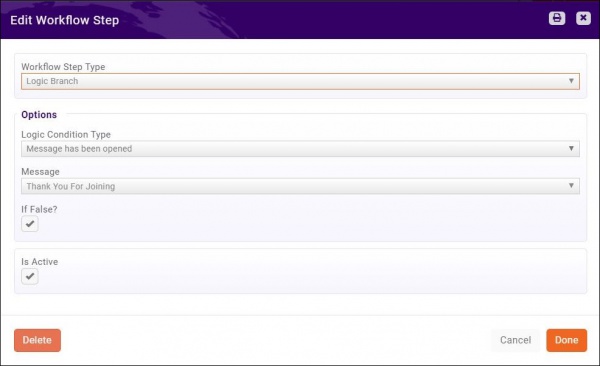
- Logic Branch: This option evaluates if a condition is true, and then determines the next step in the work-flow. For example, the system can evaluate if an email has been opened, and proceed to a certain step if it has not been, and a different step if it has been. Select the Logic Condition Type from the drop-down list. As of this writing, the only condition type available is Message has been opened. Select the Message that you wish to verify has been opened from the drop-down list.
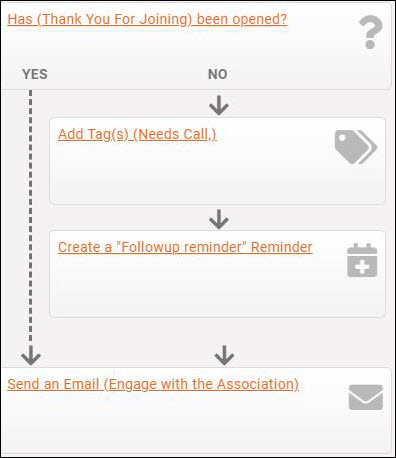
Once you have added the Logic Branch, you will now have two branches to your work flow, as shown below. Add workflow steps to each branch as needed. To do this, you will add the workflow step as described previously, then drag the step to the appropriate branch.
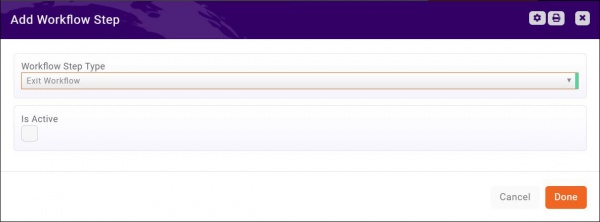
- Exit Workflow: This option completes the workflow, and immediately removes the contact from the workflow.

