Difference between revisions of "Growth Zone Staff App"
Cpetterson (talk | contribs) |
Cpetterson (talk | contribs) |
||
| Line 173: | Line 173: | ||
==Checking in Event Attendees with the GrowthZone Staff App== | ==Checking in Event Attendees with the GrowthZone Staff App== | ||
| + | |||
| + | The GrowthZone Staff App makes it easy for your staff to check-in event attendees. In addition to checking in your attendees, staff will be able to accept payment for open registration invoices, and see the registration type and the additional items the attendee has purchased. '''NOTE''': Check-in for events is only available the day of the event. | ||
===Manually Checking in an Event Attendee with the GrowthZone Staff App=== | ===Manually Checking in an Event Attendee with the GrowthZone Staff App=== | ||
| + | |||
| + | #Click '''Events''' in the left-hand navigation panel. | ||
| + | #:[[File:SAP Events.jpg|center]] | ||
| + | #Click the [[File:SAP Event Filter Icon.jpg|thumb]] to select '''Today''' as your filter for events. | ||
| + | #Select the desired event from the list. | ||
| + | #In the '''Attendees''' section, click the check-box next to the attendee you wish to check-in. | ||
| + | #*If the attendee has a balance due, the dollar bill icon will be displayed. When you select to check this attendee in, you will be prompted to '''Check-In And Pay''' or '''Check-in and Pay Later'''. If you select '''Check-in And Pay''' you will be prompted to swipe a credit card (or manually enter the card). If the attendee is paying by check, or is not ready to pay, you can select '''Check-in and Pay Later'''. | ||
| + | #*If the attendee does not have a balance due, the attendees registration information will be displayed (along with a list of any additional purchases made). Click '''Check-in''' to check the attendee in. | ||
| + | |||
| + | The attendee will be checked in and your database will be updated appropriately with attendance, payment made, or balance due. | ||
===Scanning QR Codes for Event Check-in=== | ===Scanning QR Codes for Event Check-in=== | ||
| + | |||
| + | You may choose to check in attendees using the QR codes that are included in event confirmation emails. | ||
| + | |||
| + | #Click '''Events''' in the left-hand navigation panel. | ||
| + | #:[[File:SAP Events.jpg|center]] | ||
| + | #Click the [[File:SAP Event Filter Icon.jpg|thumb]] to select '''Today''' as your filter for events. | ||
| + | #Select the desired event from the list. | ||
| + | #In the '''Attendees''' section, click the '''Scan QR Code''' link. | ||
| + | #Align your phone with the QR code. The QR code will be automatically scanned, and the appropriate attendee will be checked in. | ||
==Accepting Payment for Events with the GrowthZone App== | ==Accepting Payment for Events with the GrowthZone App== | ||
Revision as of 22:06, 24 August 2018
Contents
- 1 GrowthZone Staff App Overview
- 2 Download the GrowthZone Staff App
- 3 Staff App Navigation
- 4 Using the Staff App for Contact Management
- 5 View/Manage a Contact's Balance using the Staff App
- 6 Managing Events with the GrowthZone App
GrowthZone Staff App Overview
The GrowthZone Staff App consists of 3 of modules:
Contacts:
- Allows user to Add/Edit contacts
- Ability to sort contacts
- Scan business cards to add contact to database
- Contact’s information is “clickable” – which means tapping an address opens their location in device’s default map app, their email address opens a new email draft, and a phone number triggers a phone call to start.
Events
- Register and Check users into an event
- Ability to scan QR codes to check people in
- Calendar events can be added to devices default calendar app
Tasks
- Ability to View/Add/Edit active tasks that are assigned to you on the go
Download the GrowthZone Staff App
The GrowthZone Staff App is available for both Apple and Android devices. Search for “GrowthZone” in the app store.
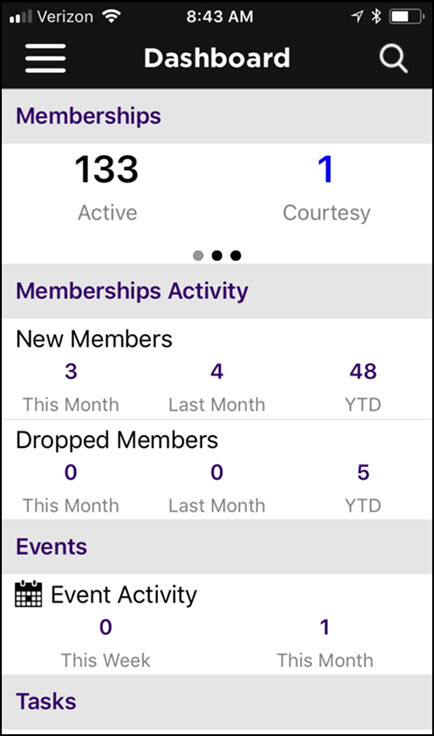
When the Staff App is first launched, your Dashboard will be displayed. The Dashboard provides an at a glance understanding of your Memberships, Events, Tasks and Lists and Committees.
Using the Staff App for Contact Management
Using the GrowthZone Staff app you can easily view, edit and add contacts to your database.
View Contacts with the GrowthZone Staff App
- Click the
 icon.
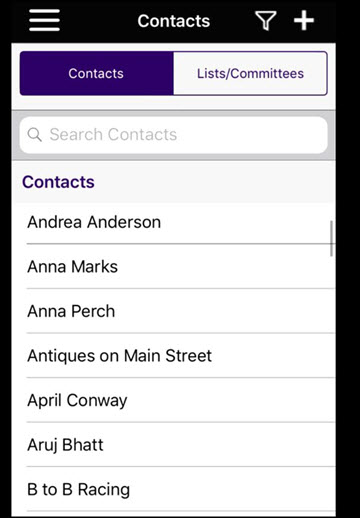
icon. - Select Contacts from the app menu. A list of all contacts in your database will be displayed. NOTE: You may also view your lists and committees.
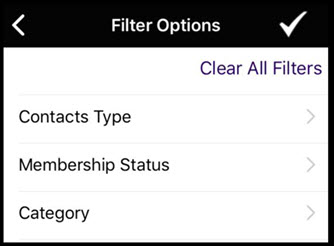
- Scroll through your list of contacts to locate the desired contact, or click the
 filter icon to filter the list. The list may be filtered by contact type, membership status and/or category.
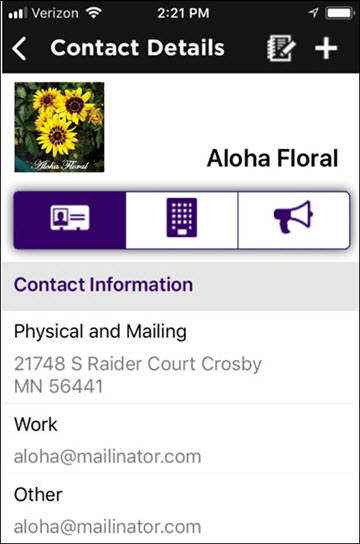
The Contacts module displays three tabs:
Update Contact Information with the GrowthZone Staff App
- Click the
 icon.
icon. - Select Contacts from the app menu. A list of all contacts in your database will be displayed.
- Scroll through your list of contacts to locate the desired contact, or type the name of the contact into the Search Contacts text box.
- Click the desired contact in the list.
- Click the Contact Information that you wish to change:
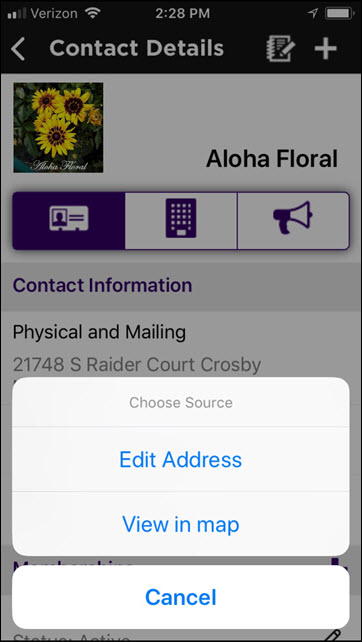
- If you click on an address field, you can choose to update the address OR view the location of the address on a map.
-
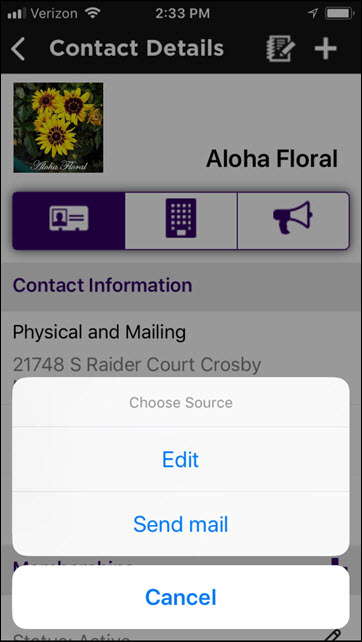
- If you click on an email field, you can choose to update the email address OR send an email.
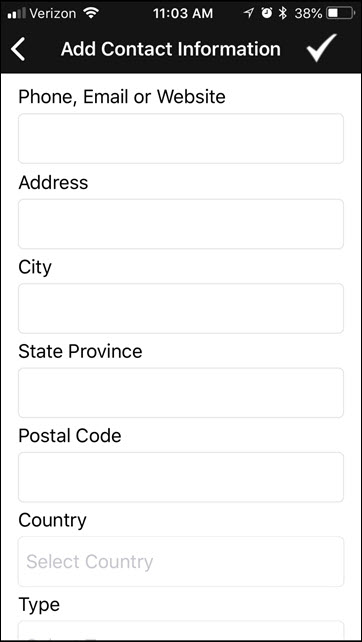
NOTE: If you wish to add contact information to an existing contact, while on that contact's page, click the ![]() icon.
icon.
Add Contacts with the GrowthZone Staff App
Add Contact Manually
- Select Contacts from the app menu.
- From the list of contacts, click the
 icon.
icon.
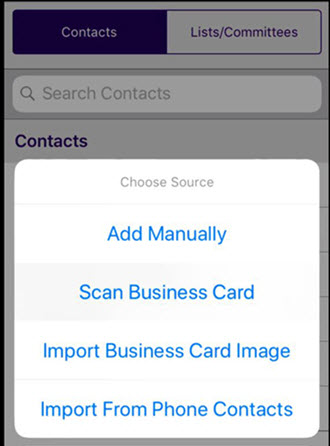
- Click Add Manually.
- Enter the desired contact information, then click the
 icon to save changes.
NOTE: You may also add a Profile Image while adding a contact manually.
Add a Contact by Scanning a Business Card
You can easily add new contacts to the database by just scanning their business card.
- Select Contacts from the app menu.
- Click the
 icon.
icon.
- Click Scan Business Card. The camera on your phone will be enabled.
- Take photo of the business card.
- Click Use Photo or Retake as necessary. When Use Photo is selected, the app will process the photo and and populate the contact information in the appropriate fields.
- Click the
 icon to save the new contact.
Add a Contact by Importing a Business Card Image
This option allows you to select an image of a business card from the photos on your phone.
- Select Contacts from the app menu.
- Click the
 icon.
icon.
- Click Import Business Card Image. The photos on your phone will be available for you to select the desired business card image.
- Select the desired image, the app will process the business card information and populate the appropriate fields.
- Click the
 icon to save the new contact.
Add a Contact by Importing from Phone Contacts
- Select Contacts from the app menu.
- Click the
 icon.
icon.
- Click Import from Phone Contacts. Your phone address book will be displayed.
- Select the contact you wish to add.
- Click the
 icon to save the new contact.
View/Manage a Contact's Balance using the Staff App
Using the staff app, you can easily view a contact's open invoices, and, if using GrowthZone Pay accept credit card payment for open invoices.
View a Contact's Billing Balance and Open Invoices
- Click the
 icon.
icon. - Select Contacts from the app menu. A list of all contacts in your database will be displayed.
- Scroll through your list of contacts to select the desired contact. Alternately, simply type the name of the contact in the Search Contacts text box.
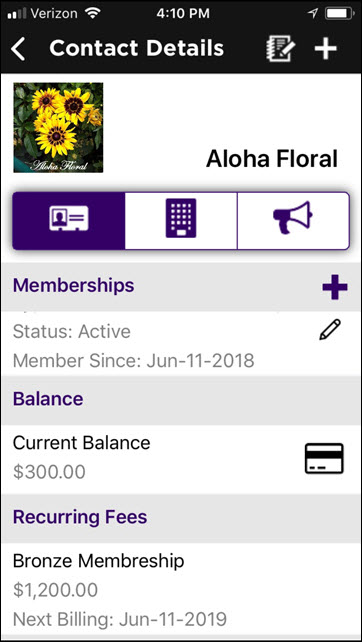
- On the Contact Details tab, the current balance for the contact will be displayed in the Balance section.
- Click the
 icon to view a list of open invoices.
Pay a Contact's Open Invoice(s) using the Staff App
- Click the
 icon.
icon. - Select Contacts from the app menu. A list of all contacts in your database will be displayed.
- Scroll through your list of contacts to select the desired contact. Alternately, simply type the name of the contact in the Search Contacts text box.
- On the Contact Details tab, the current balance for the contact will be displayed in the Balance section.
- Click the
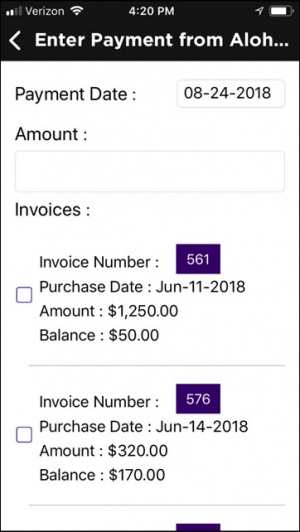
 icon to view a list of open invoices.
- Click into the Amount text-box and enter the amount to be paid OR click the check-box(es) for the invoices to be paid. When invoices are selected, the amount of the invoice is automatically populated in the Amount field.
- Click the
 button at the bottom of the screen.
Managing Events with the GrowthZone App
The GrowthZone staff app makes it easy for you to register and check users into an event (manually or by scanning the QR code provided in an attendees confirmation email). Payment for event attendees may be accepted manually, or by use of a mobile credit card reader.
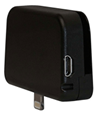
We recommend the follow readers, available for purchase at posguys.com
For iPhones without an audio jack:
Viewing Events in the GrowthZone Staff App
You can easily view and manage events using the Staff App.
Add Events with the GrowthZone Staff App
Checking in Event Attendees with the GrowthZone Staff App
The GrowthZone Staff App makes it easy for your staff to check-in event attendees. In addition to checking in your attendees, staff will be able to accept payment for open registration invoices, and see the registration type and the additional items the attendee has purchased. NOTE: Check-in for events is only available the day of the event.
Manually Checking in an Event Attendee with the GrowthZone Staff App
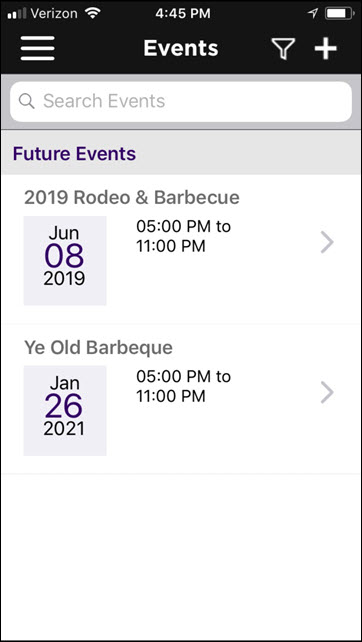
- Click Events in the left-hand navigation panel.
- Click the to select Today as your filter for events.
- Select the desired event from the list.
- In the Attendees section, click the check-box next to the attendee you wish to check-in.
- If the attendee has a balance due, the dollar bill icon will be displayed. When you select to check this attendee in, you will be prompted to Check-In And Pay or Check-in and Pay Later. If you select Check-in And Pay you will be prompted to swipe a credit card (or manually enter the card). If the attendee is paying by check, or is not ready to pay, you can select Check-in and Pay Later.
- If the attendee does not have a balance due, the attendees registration information will be displayed (along with a list of any additional purchases made). Click Check-in to check the attendee in.
The attendee will be checked in and your database will be updated appropriately with attendance, payment made, or balance due.
Scanning QR Codes for Event Check-in
You may choose to check in attendees using the QR codes that are included in event confirmation emails.
- Click Events in the left-hand navigation panel.
- Click the to select Today as your filter for events.
- Select the desired event from the list.
- In the Attendees section, click the Scan QR Code link.
- Align your phone with the QR code. The QR code will be automatically scanned, and the appropriate attendee will be checked in.
