Difference between revisions of "Fundraising"
Jump to navigation
Jump to search
Cpetterson (talk | contribs) |
Cpetterson (talk | contribs) |
||
| Line 80: | Line 80: | ||
| − | + | How do I end a recurring donation? [[Fundraising#View_Recurring_Donations|Click Here]] | |
Revision as of 20:36, 14 August 2017
Contents
Overview
The GrowthZone Fundraising module provides the functionality to manage fundraising campaigns for both pledge-based and non-pledge donations.
Add a New Fundraising Campaign
- Click Fundraising in the Navigation Panel. The Fundraising module will display all of your fundraising campaigns.
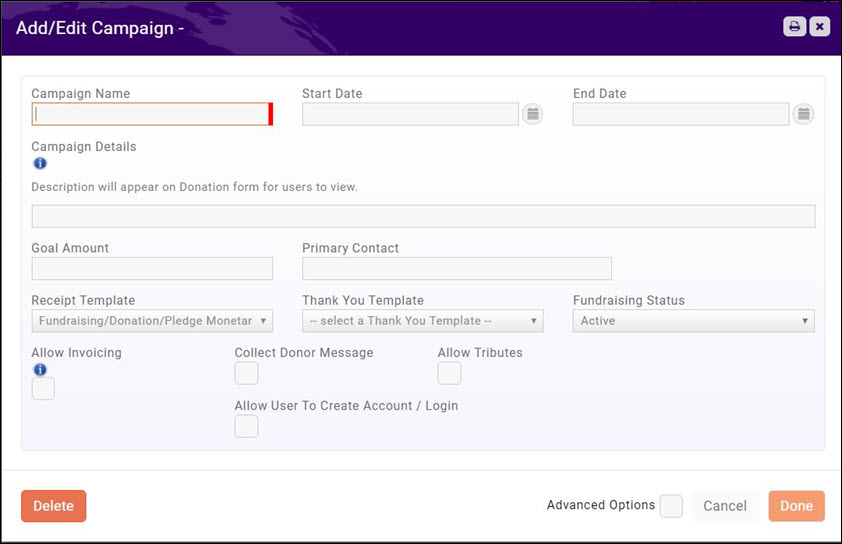
- Click the Add New button.
- Enter a Campaign Name for the new campaign.
- Enter the Start Date and End Date for this campaign.
- Enter a Description of the new campaign.
- Enter the Goal Amount for the new campaign. This is a dollar value goal.
- Enter the Primary Contact for this campaign.
- Select the Receipt Template you wish to use for this campaign. Click here for details on managing and editing your templates.
- Select the Thank You Template you wish to use for this campaign. Click here for details on managing and editing your templates.
- Select the Fundraising Status for this campaign from the drop-down list.
- If you wish to allow a donor to be billed, click the Allow Invoicing check-box.
- If you wish to allow a donor to enter a message, click the Collect Donor Message check-box.
- If you wish to allow tributes, click the Allow Tributes check-box.
- If you wish to allow the donor to create log-in credentials to the Info Hub, click the Allow User To Create Account / Login. This is best practice to allow the donor to store their credit card information.
- Click Done.
NOTE: Once the settings are saved, a Donation Link will be available on the Donations Setup tab. This link may be added to your web-page
After completing the initial setup of the campaign, you will associate fee items to the campaign on the Donation Setup tab.
- On the Donation Setup tab, click the + in the Donation/Pledge Items section.
- Select a previously created good/service in the Item drop-down list OR click the
 to add a new goods/service. Click here for details on setting up good/services.
 - If this fee item is a pledge, click the Is a Pledge check-box.
- To edit the amounts associated with this good/service click the pencil icon.
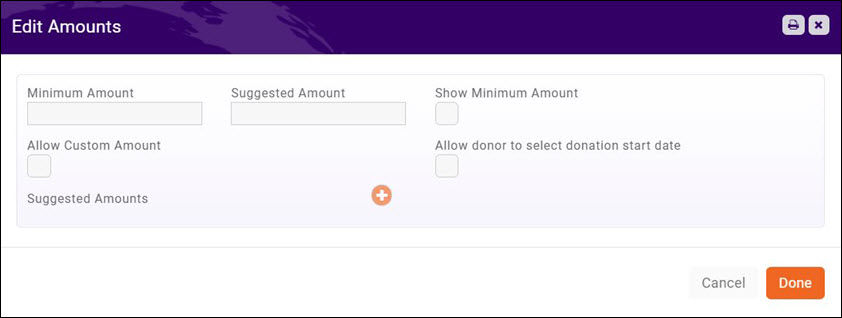
- On the Edit Amounts screen, configure the following:
- Minimum Amount - this setting allows you to define the minimum donation dollar valueSuggested Amount.
- Suggested Amount - this setting allows you to define the suggested dollar value of a donation.
- Show Minimum Amount - select this check-box if you wish to display the minimum amount on the donation form.
- Allow donor to select donation start date - click this check box to allow a donor who is contributing on a recurring basis to define their own start date.
- Allow Custom Amount - select this check box to allow donors to enter any donation amount.
- Click Done.
- Click Save.
Managing Donors/Donations
Various functions are available in the Fundraising module to manage your donors and donation.
View All Donation Activity
- Click Fundraising in the Navigation Panel. The Fundraising module will display all of your fundraising campaigns.
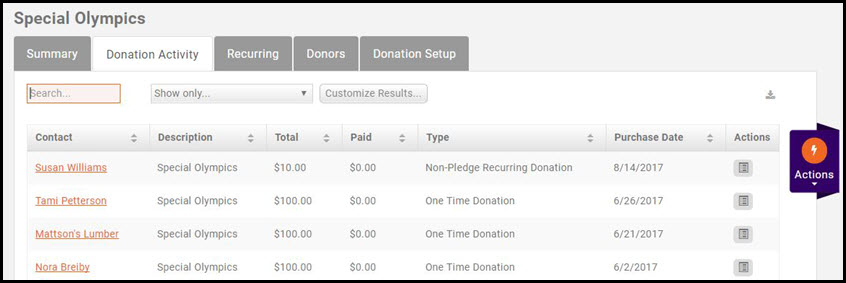
- Click the hyper-link for the desired fundraiser.
- Click the Donation Activity tab. The Donation Activity tab will display both one time and recurring donations.
Click the ![]() to view the details of the donation.
to view the details of the donation.
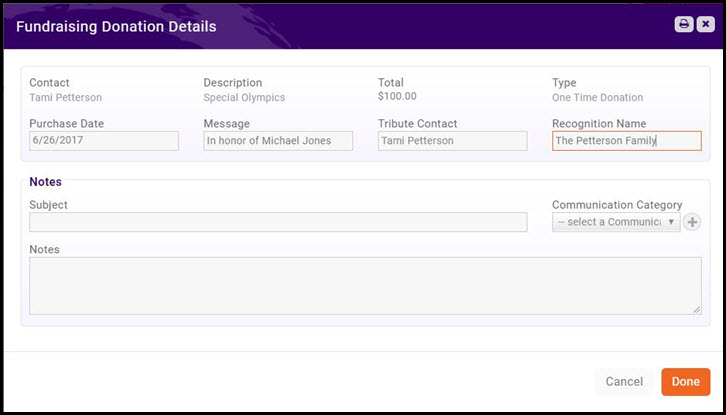
On the Fundraising Donation Details screen you can edit the donation details, as well as add notes.
View Recurring Donations
- Click Fundraising in the Navigation Panel. The Fundraising module will display all of your fundraising campaigns.
- Click the hyper-link for the desired fundraiser.
- Click the Recurring tab to display all recurring donations.
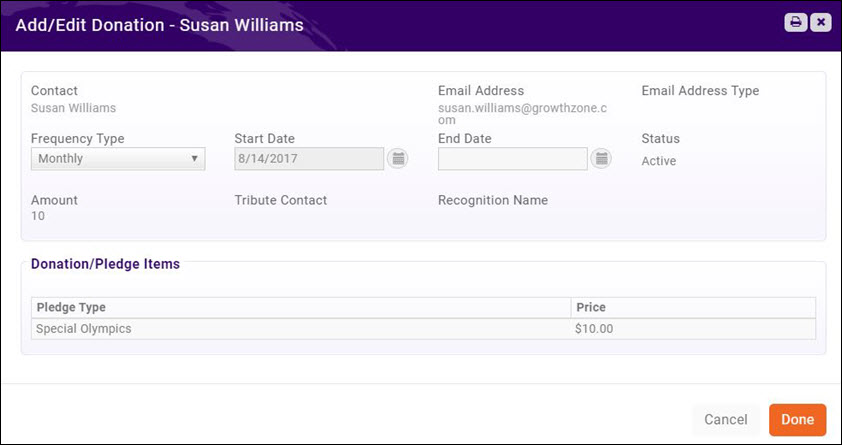
Click the ![]() to edit the recurring donation.
to edit the recurring donation.
NOTE: You will be able to edit the frequency of the donation, and the end date for the donation
Fundraiser FAQ's
How do I end a recurring donation? Click Here

